Cutting a miter joint with a hand saw is a fundamental skill that every woodworker, whether a DIY enthusiast or a professional, should master. As a hand saw supplier, I’ve witnessed firsthand the transformative power of a well – executed miter joint in woodworking projects. In this blog, I’ll guide you through the process of cutting a miter joint using a hand saw, offering tips and techniques that will elevate your woodworking game. Hand Saw

Understanding Miter Joints
Before we delve into the cutting process, it’s essential to understand what a miter joint is. A miter joint is formed by joining two pieces of wood at an angle, typically 45 degrees, to create a corner. This type of joint is commonly used in picture frames, baseboards, crown moldings, and many other woodworking projects. The key to a successful miter joint lies in making accurate cuts so that the two pieces fit together seamlessly.
Choosing the Right Hand Saw
The first step in cutting a miter joint is selecting the appropriate hand saw. As a hand saw supplier, I know that different saws are designed for different tasks. For miter cuts, a fine – toothed backsaw or a miter saw is often the best choice.
- Backsaw: Backsaws are known for their precision. They have a stiffening rib on the back of the blade, which helps to keep the blade straight during the cut. The teeth of a backsaw are small and closely spaced, making them ideal for making clean, accurate cuts in wood. A dovetail saw, which is a type of backsaw, can also be used for smaller miter joints.
- Miter Saw: While not a traditional hand saw, a miter box with a hand saw blade can be a great tool for cutting miter joints. The miter box guides the saw at the correct angle, ensuring consistent and accurate cuts. It’s especially useful for beginners or when making multiple cuts at the same angle.
Preparing Your Workspace
A proper workspace is crucial for making accurate miter cuts. Here’s how you can set up your workspace effectively:
- Stable Surface: Use a sturdy workbench or sawhorse to support your workpiece. Make sure it’s level and free of any debris that could interfere with your cut.
- Clamps: Secure your workpiece to the work surface using clamps. This will prevent the wood from moving during the cut, which can lead to inaccurate cuts and potential safety hazards.
- Lighting: Ensure that your workspace is well – lit. Good lighting will help you see the cutline clearly and make more accurate cuts.
Marking the Cut
Accurate markings are essential for a successful miter joint. Here’s how to mark your cut:
- Measure and Mark: Use a measuring tape and a pencil to measure and mark the length of your workpiece. For a 45 – degree miter joint, you’ll need to mark the angle on the wood. You can use a miter square or a protractor to mark the 45 – degree angle precisely.
- Double – Check: Before you start cutting, double – check your measurements and markings. A small error in measurement can result in a poorly fitting miter joint.
Cutting the Miter Joint
Now that you’ve prepared your workspace and marked your cut, it’s time to start cutting:
- Positioning the Saw: If you’re using a backsaw, hold the saw at a slight angle to the workpiece, following the marked cutline. Make sure the teeth of the saw are facing forward. If you’re using a miter box, insert the saw blade into the appropriate slot in the miter box and align it with the marked cutline.
- Starting the Cut: Make a small, shallow cut at the beginning of the marked line to establish the cut. This will prevent the saw from wandering off the line as you start cutting.
- Cutting Technique: Use long, smooth strokes when cutting. Apply gentle pressure downwards and forward, allowing the saw teeth to do the work. Keep your hand steady and follow the marked cutline closely. If you’re using a miter box, let the box guide the saw to ensure a straight and accurate cut.
- Completing the Cut: Continue cutting until you’ve reached the end of the marked line. Take your time and make sure the cut is clean and straight. If necessary, you can stop periodically to check the progress of the cut.
Testing and Adjusting the Joint
Once you’ve made the cuts, it’s time to test the fit of the miter joint:
- Fitting the Pieces: Bring the two pieces of wood together at the miter cut. Check if the joint fits snugly and if the corners are square. If there are any gaps or misalignments, you may need to make some adjustments.
- Adjusting the Cut: If the joint is too loose, you can make a slightly deeper cut on one or both pieces of wood. If the joint is too tight, you can carefully sand or file the edges of the cut to make a better fit.
Finishing Touches
After ensuring that the miter joint fits properly, you can add some finishing touches:
- Sanding: Sand the edges of the joint to smooth out any rough spots and make the joint look more professional. Use a fine – grit sandpaper and sand in the direction of the wood grain.
- Gluing: Apply wood glue to the miter joint and clamp the two pieces together. Wipe off any excess glue with a damp cloth and let the glue dry according to the manufacturer’s instructions.
- Staining or Painting: Once the glue has dried, you can stain or paint the miter joint to match the rest of your woodworking project.
Tips for Success
Here are some additional tips to help you cut perfect miter joints with a hand saw:
- Practice Makes Perfect: Don’t be discouraged if your first few miter joints don’t turn out perfectly. Practice on scrap pieces of wood until you feel confident in your cutting technique.
- Keep Your Saw Sharp: A sharp saw blade will make cutting easier and more accurate. Regularly sharpen your hand saw to ensure optimal performance.
- Use a Guide: If you’re having trouble making straight cuts, you can use a straightedge or a guide block to help keep the saw on track.
- Take Your Time: Rushing through the cutting process can lead to mistakes. Take your time, focus on accuracy, and enjoy the woodworking process.
Conclusion
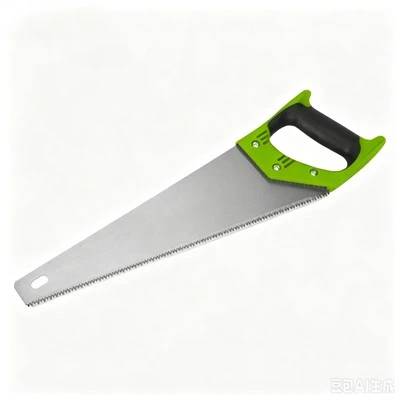
Cutting a miter joint with a hand saw is a skill that can enhance your woodworking projects and give them a professional look. As a hand saw supplier, I’m committed to providing high – quality hand saws that can help you achieve the best results. Whether you’re a beginner or an experienced woodworker, mastering the art of cutting miter joints will open up a world of possibilities in your woodworking endeavors.
Waist Saw If you’re interested in purchasing hand saws for your woodworking projects or have any questions about cutting miter joints, I encourage you to reach out. We’re here to assist you with your procurement needs and provide expert advice on choosing the right tools for the job. Contact us today to start a discussion about how we can support your woodworking journey.
References
- "The Complete Guide to Woodworking Joints" by Popular Woodworking Magazine
- "Woodworking Basics: Mastering the Miter Joint" by Fine Woodworking
- "Hand Saw Techniques for Beginners" by Woodcraft Magazine
Shandong Siri-Tools Co., Ltd.
As one of the most professional hand saw manufacturers in China, we also support customized service. We warmly welcome you to buy high quality hand saw for sale here from our factory. If you have any enquiry about cooperation, please feel free to email us.
Address: Hedong Distric, Linyi City, Shandong Province
E-mail: cathysiri@siri-tools.com
WebSite: https://www.siri-tools.com/
